Emerging
WA ceramic artists Danica Wichtermann, Natalie Acton and Sarah Hannah
present new works in porcelain inspired by the alluring land, sea and
botanical life of Western Australia. This collection of works will be
particularly exploring WA’s hidden beauty, things which are often
overlooked, forgotten or taken for granted.
Each piece will reflect
its own journey of our environment, exploring colour, form, texture and
feeling. The intent is not to replicate objects, but to simply
translate something seen, or experienced in a unique and interesting
way.
A Porcelain Perspective: From the Land to the Sea
15 February-3 March 2013
Official Opening on Saturday 16th February at 2pm.
Zig Zag Cultural Centre Art Gallery, Kalamunda.
http://www.zzcc.com.au/art-gallery
We hope to see you there!

Tuesday, January 8, 2013

Wednesday, August 17, 2011
Creating a double walled wheel thrown vessel
Creating a double walled wheel thrown vessel
*to fully understand this process, one must know the basics in throwing on the wheel.
*to fully understand this process, one must know the basics in throwing on the wheel.

This image shows some of the different stages of creating a double walled vessel.
To create a double walled vessel I first make a ball with a wedged piece of clay and centre it on the wheel, leaving a flattened top. With a scoring tool or my finger I draw a circle on the top, dividing the piece into two.

I then push down the outside circle to create an upside down mushroom. I use the inner piece of raised clay to create the inside vessel, starting with a simple cylinder. The inside cylinder is refined and worked on until the walls have been thinned out to the desired width.

The next stage involves using the outside circle of clay to create a second (larger-surrounding) vessel. To do this you need to use your fingers to create an indentation around the outer base of the inside vessel, making sure you do not press all the way down to the wheel head (leave clay an inch or so thick at base). The walls of the clay can then be pulled up to thin them out. The walls or sides of the vessel must be pulled straight up, not on an angle; otherwise they will become weak and loose their shape and structure. Only once you have thinned out the walls of the outside vessel can you shape it more. To make it curve around the inside vessel start at the bottom with fingers on each side of the walls and push clay gently outwards to give it a belly. The top rim can be curved inwards by cupping the vessel near the top and pushing inwards.

Your basic shape is complete and you can now spend time shaping both of your inner and outer vessels. A heat gun can be used to slightly dry the vessels throughout, so that the clay keeps its strength and the walls don’t go floppy or loose their shape.
 Once you have achieved your desired shape, cut it off the wheel and set it to dry. At this point you can also use your hands or sponged to alter the shape of you double walled vessel, giving it movement and a less traditional form.
 Once the piece is leather hard it can be trimmed. I generally also carve my works at this point, changing the shape of the rim and also carving away sections of the outside vessel, giving it texture and a more sculpted look.
Thursday, July 28, 2011
My next series is on its way…
I find myself going more sculptural and further away from the traditional wheel thrown vessel.
* * *
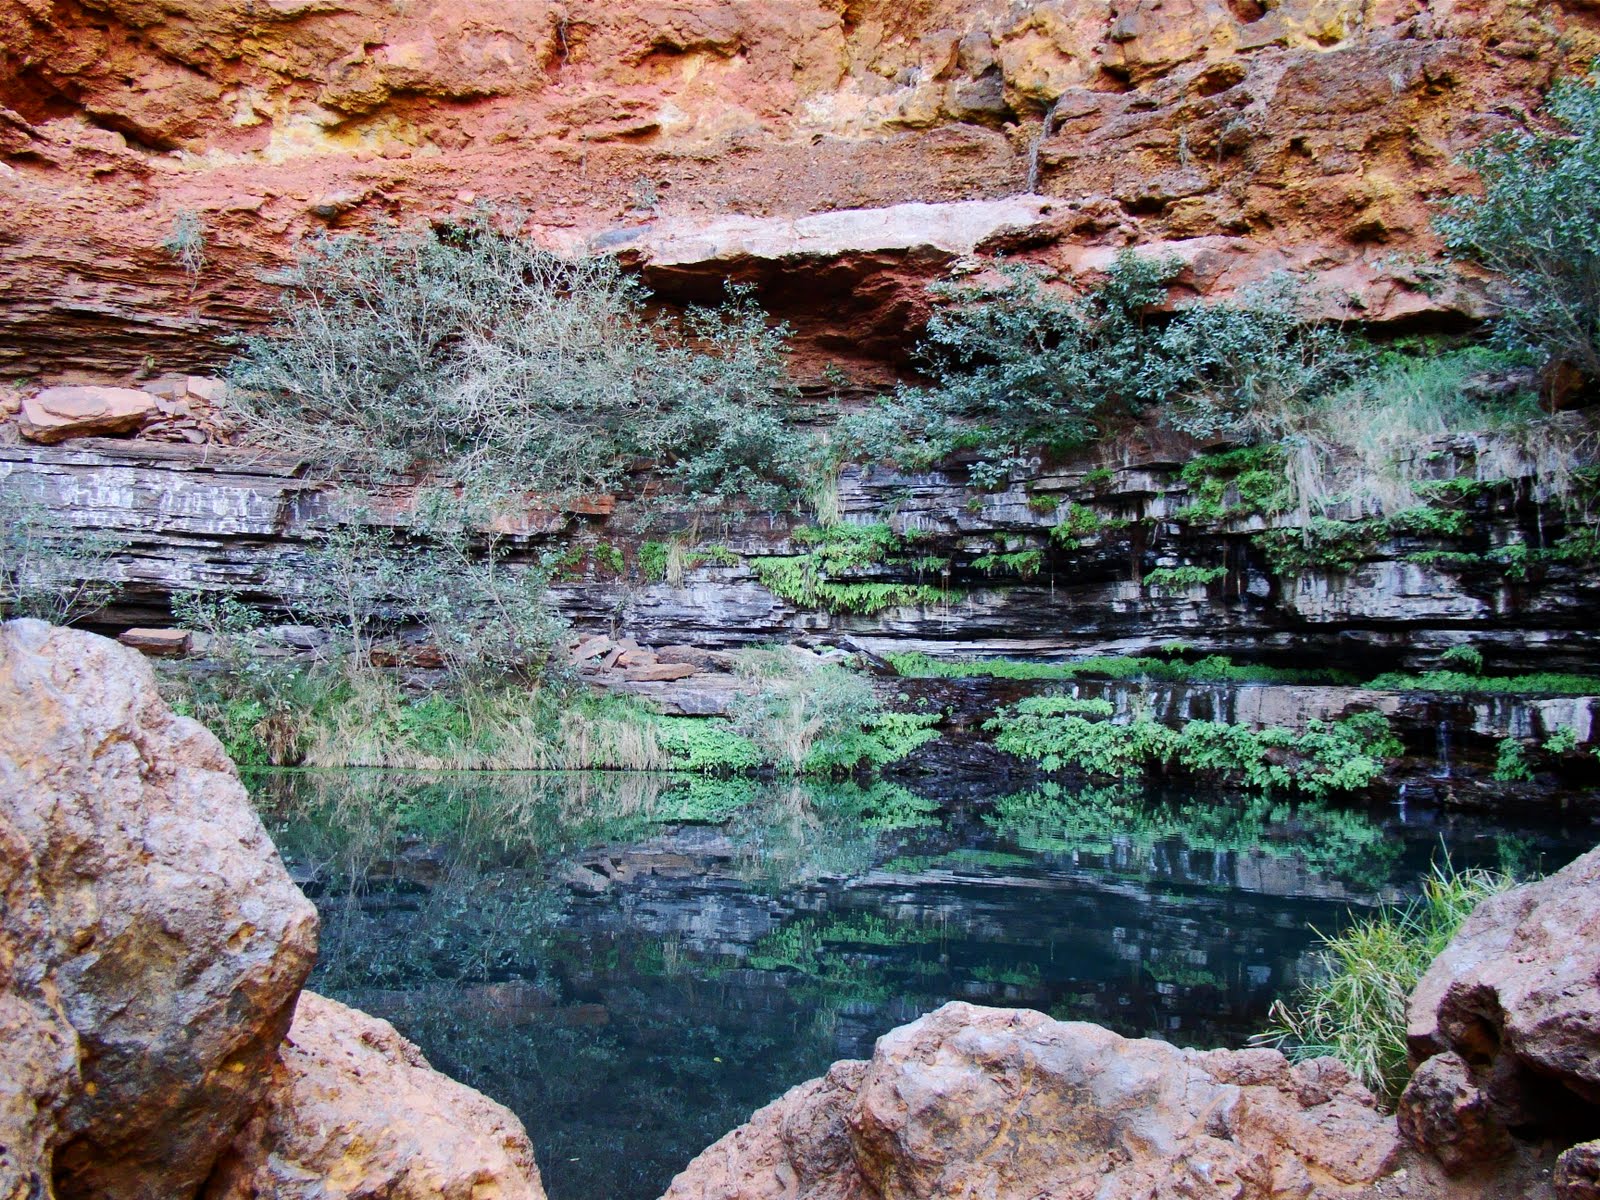
My latest pieces have been carve on the outside, inspired by the patterns and textures of these rock gorges. The surface is further enhanced when I spray on different tones and colours of under-glaze, highlighting parts and also adding shadow. The colours I will be using are inspired by the lush greenery or the bright blues of the rock pools and sky, contrasting with the warm reds and earthy colours of the surrounding stone walls.
My latest works have been inspired by my recent journey up North in the Pilbara region and Karijini National park.
It was an amazing experience and I would encourage all to get outdoors and see what our beautiful land has to offer!


I loved the serenity of Karijini, the gorges and waterfalls and cold nights with star filled skies.
It was an amazing experience and I would encourage all to get outdoors and see what our beautiful land has to offer!


I loved the serenity of Karijini, the gorges and waterfalls and cold nights with star filled skies.
* * *
My latest pieces have been carve on the outside, inspired by the patterns and textures of these rock gorges. The surface is further enhanced when I spray on different tones and colours of under-glaze, highlighting parts and also adding shadow. The colours I will be using are inspired by the lush greenery or the bright blues of the rock pools and sky, contrasting with the warm reds and earthy colours of the surrounding stone walls.


Tuesday, July 19, 2011
The Making Process!
For those of you who may be interested...I thought I'd add some information on the making process of my latest works!

As shown above, each piece is first thrown as a symmetrical vessel on the wheel. (In this case I have thrown a double walled vessel- this is done by centring one large piece of clay on the wheel, then dividing the clay so I can pull up a small vessel on the inside and then a larger one outside, but they are both attached and one piece).


As shown above, each piece is first thrown as a symmetrical vessel on the wheel. (In this case I have thrown a double walled vessel- this is done by centring one large piece of clay on the wheel, then dividing the clay so I can pull up a small vessel on the inside and then a larger one outside, but they are both attached and one piece).
Once thinned out and smoothed, I then alter the form using my fingers, sponges or a tool, to transform the shape, adding movement to give it a more sculptural look.

Once leather hard, the base is trimmed and the rest of the shaping takes place. Generally I first draw where I will cut out and carve, working with the new shape as a guideline. I work with the clay in a similar way than I do with wood; carving and sculpting with the grain to enhance its natural beauty. With clay, there is no obvious grain to follow, so I work with the flow of the form I have created, drawing form my inspirations in nature to complete it.
Each piece then goes on its own journey of refinement; smoothing, sanding, and spraying on different shades of underglazes, before being bisque fired. The works are then cleaned and sanded if needed, glazed on either the internal or external surface, and then the opposite surface is resprayed with multiple coats and shades of either underglaze colours or mat glazes. They are then high fired to 1280° c, 1300 for Southern Ice Porcelain.
Each piece comes out of the second firing looking quite different to what it did originally. The works shrink in size, up to 15% and can also warp- the more I carve away from the piece, the more movement is likely to occur during firing. The glaze colours also come out a lot brighter.
As seen in the first series of images, the image on the right is before firing, and the image bellow is once it is finished.


This particular piece was done in collaboration with my father, Nis Wichtermann, who created the carved olive stump. My piece is the Olive Blossom on top.
It was purchased by Mayor Logan Howlett at the Show Off 7 Exhibition, May 2011
Wednesday, July 13, 2011
Restless!
So I have just had surgery on my right knee, and am out of action for a while…but so restless! I never though I'd recover this fast, I mean it's 3 days post-op and I’m already hobbling around, attempting to do gardening with my crutches clasped tightly in one hand to support me and trying to bend down low enough to rip out these damn weeds!
I’m just glad I’ve got some updates to do on my website- that will last a few day at least! Them I’m sure I’ll try to convince my friend Patricia Fernandes to take me down to Canning Arts Centre so that I can at least sand and glaze some of my work (yay for me for throwing and trimming about 30 pieces last week, knowing I wouldn’t be able to go on the wheel as can’t bend or push pedal with right leg- sigh).
So...back to computer work for now..
Saturday, July 9, 2011
So finally the blogging begins!
My friend Patricia will be very proud of me when she sees I have finally started a blog!
The only thing now is actual knowing what to write....
The only thing now is actual knowing what to write....
Hmmmm so I won't go into details about me or my work, but feel free to check out it all out on my website or facebook page:
http://www.rediscovering.com.au/ or w.facebook.com/DanicaWCeramics
http://www.rediscovering.com.au/ or w.facebook.com/DanicaWCeramics
For now, here are some of my latest works-
![]()
![]()
![]()
![]()
![]()
Come on down and check them out for yourself at the WA Visual Arts Expo- Sunday 10


July 10-4pm @
Subscribe to:
Posts (Atom)